Getting Started with Amazon EKS
Set up an Amazon EKS cluster and deploy a sample Kubernetes application on AWS.
Kubernetes has become an industry standard for container orchestration.
Setting up and maintaining Kubernetes clusters in the cloud can still be challenging. You need to manage networking, control-plane access, security, updates, and patches.
Amazon Elastic Kubernetes Service (EKS) manages the Kubernetes control plane so you can focus on deploying and operating workloads.
This guide walks through setting up an EKS cluster and deploying a Kubernetes application on AWS.
Step 0: Before you start
Warning (Historical guide)
This article reflects the Amazon EKS workflow available when it was published in 2022. Kubernetes versions, CloudFormation templates, and recommended EKS access methods change over time, so compare each step with the current Amazon EKS documentation before using it in production.
Step 1: Creating an EKS role
Our first step is to set up a new IAM role with EKS permissions.
To do this, follow these steps:
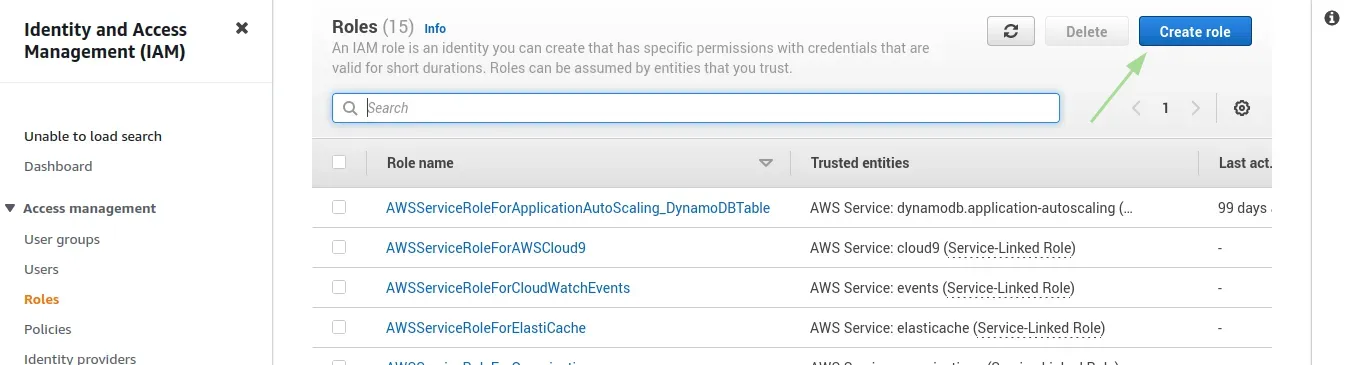
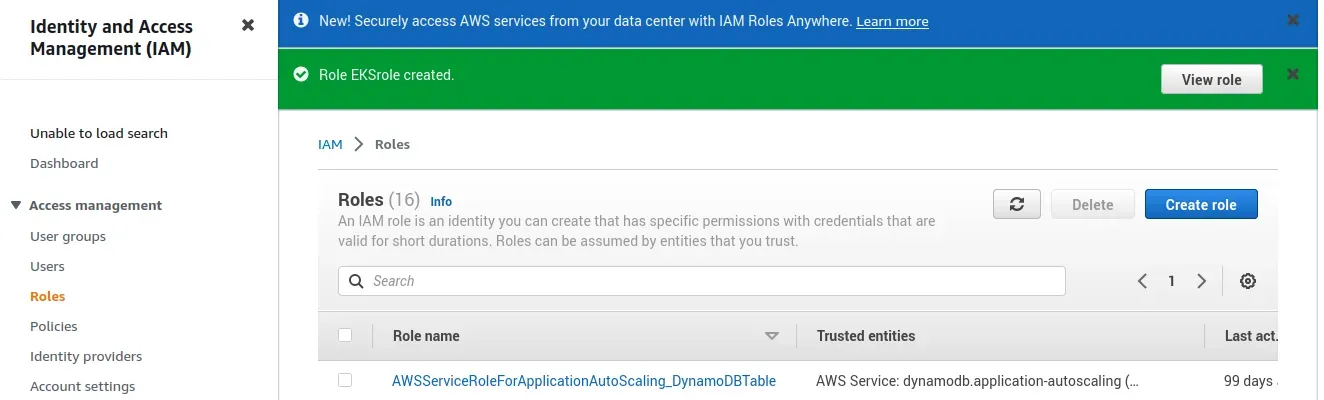
Open the IAM console, Select the Roles section on the left side of the page, then click the Create Role button at the top of the page.
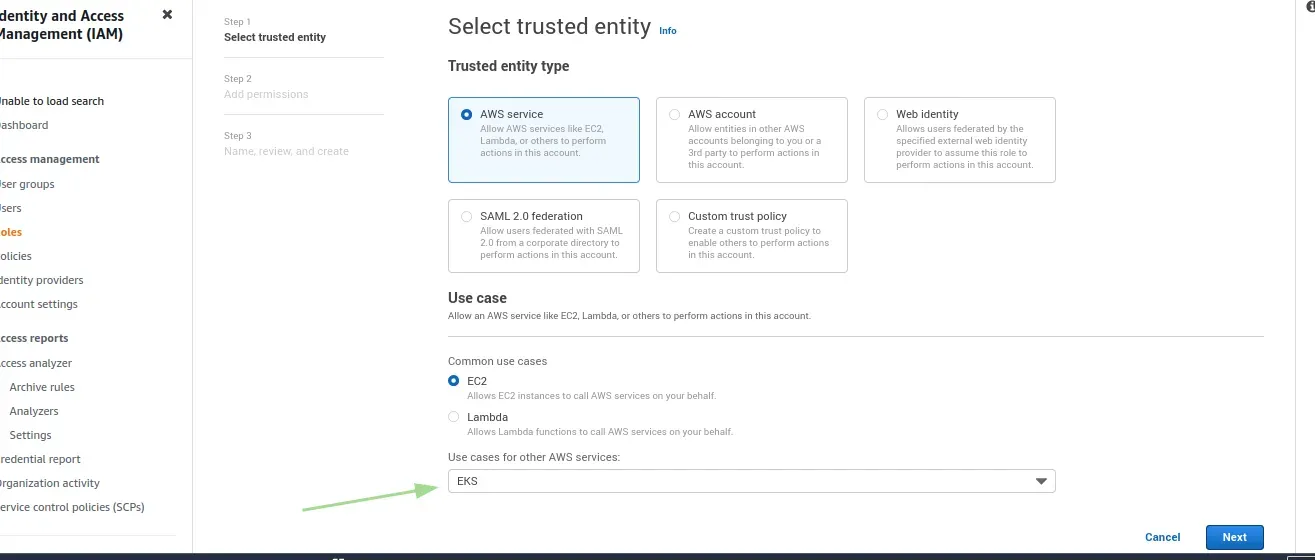
From the list of AWS services, select EKS and then Next: Permissions at the bottom of the page.
Select policies as in the image, and proceed to the Review page.

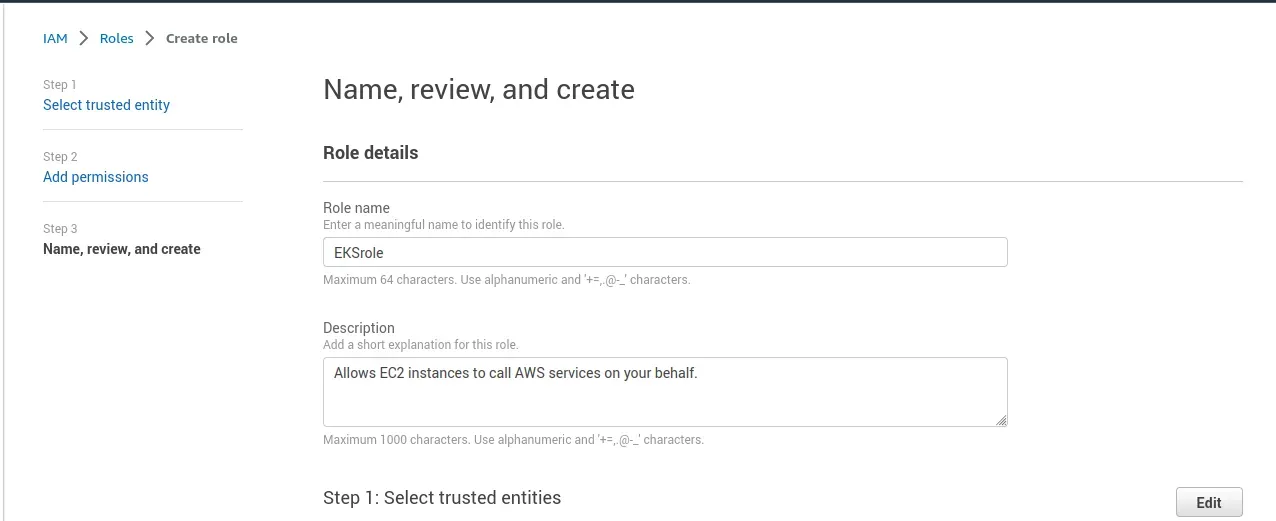
Enter a name for the role and hit the Create role button at the bottom of the page to create the IAM role.
The IAM role is created.
Note
Be sure to record the Role ARN, as you’ll need it later when creating your Kubernetes cluster, And Amazon EKS now also offers service account IAM roles, eliminating previous iterations’ requirement for extended worker node permissions.
Step 2: Creating a VPC for EKS
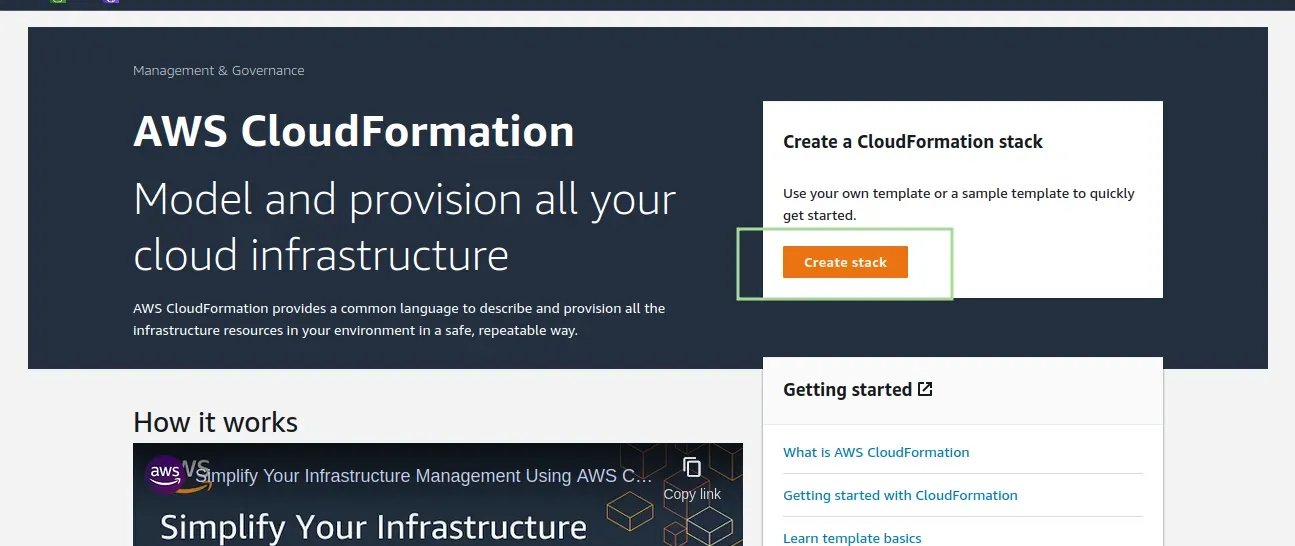
Now, we’re going to create a separate VPC that protects the communication between worker nodes and the AWS Kubernetes API server for our EKS cluster. To do this, we’re going to use a CloudFormation template that contains all the necessary EKS-specific ingredients for setting up the VPC.
Open up CloudFormation and click the Create new stack button.
On the Select template page, enter the URL of the CloudFormation YAML in the relevant section:
https://amazon-eks.s3-us-west-2.amazonaws.com/cloudformation/2019-01-09/amazon-eks-vpc-sample.yaml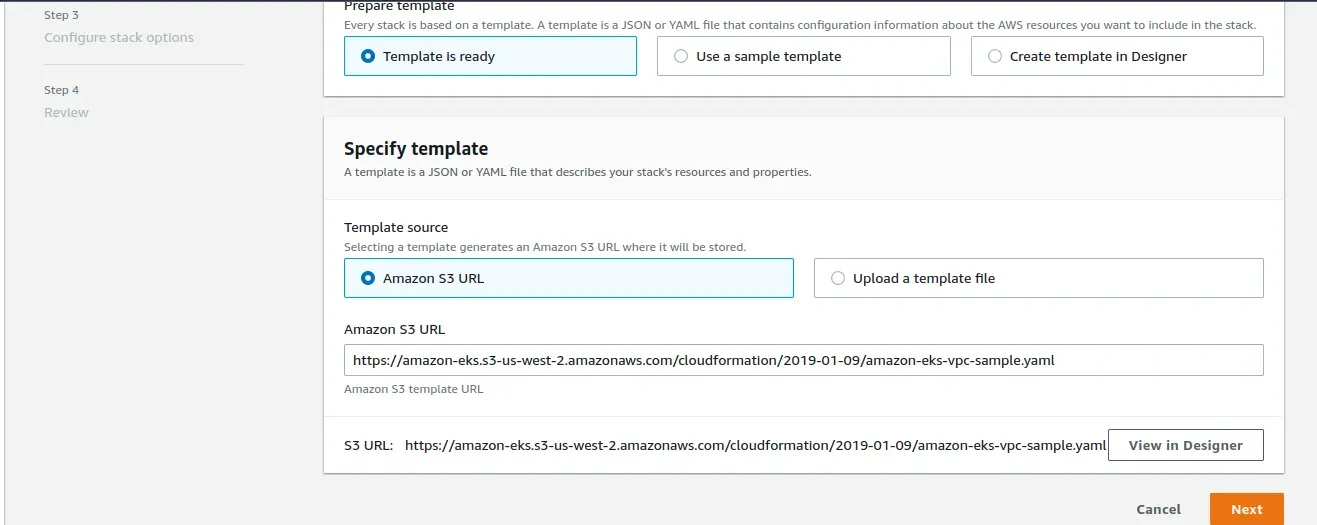
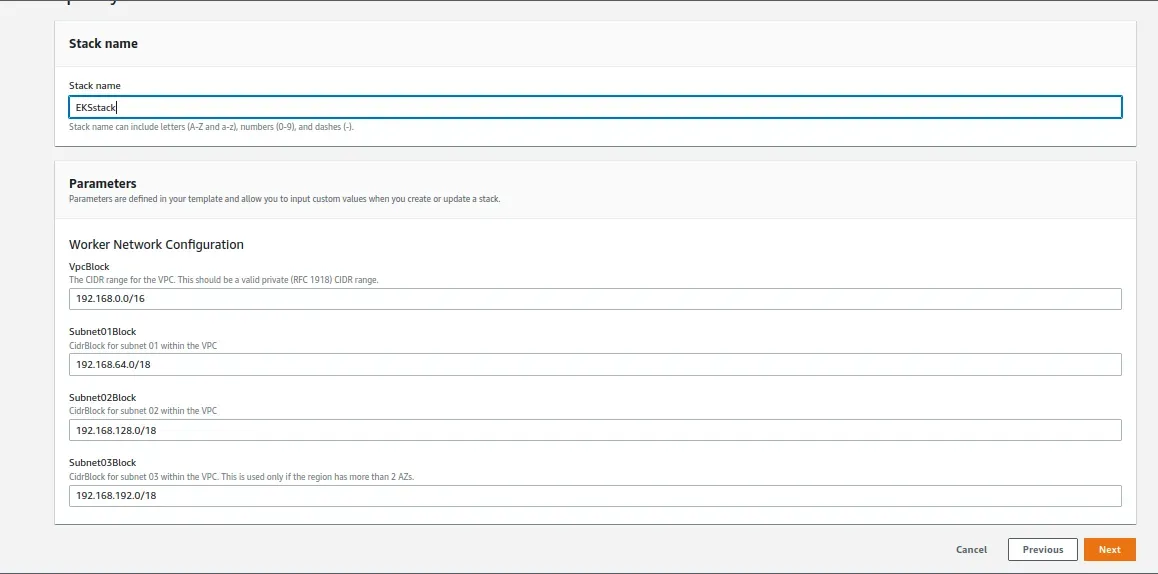
Click Next and choose the name of the stack, leave the default network configurations as is, and click Next.
Leave the default options untouched and then click Next and Next.
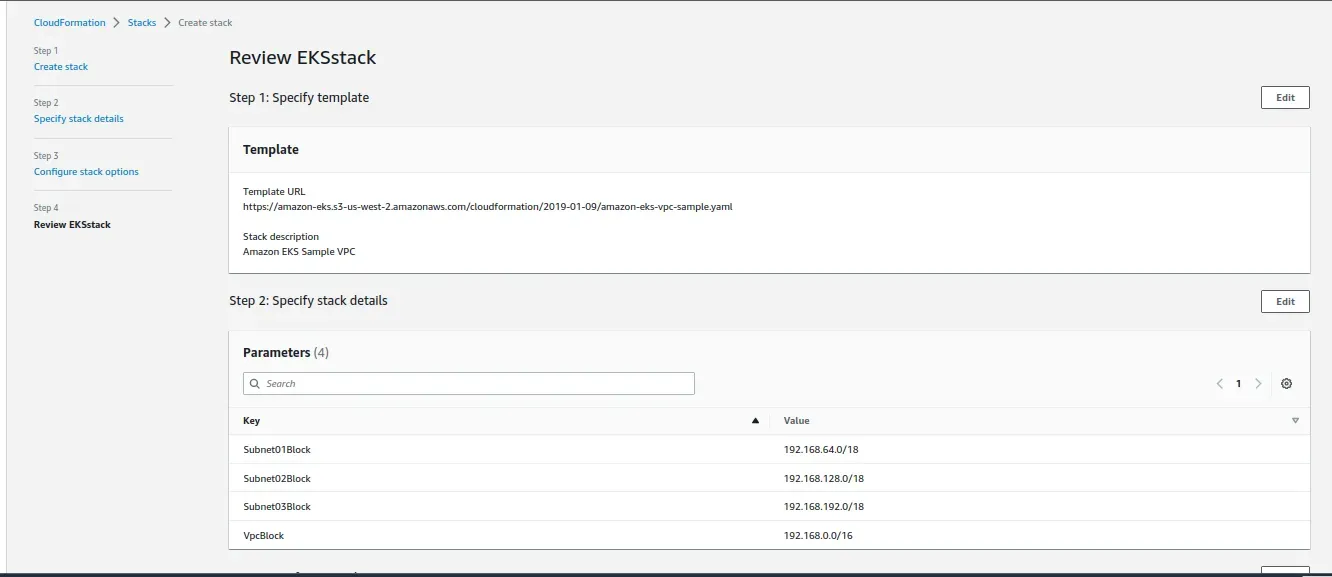
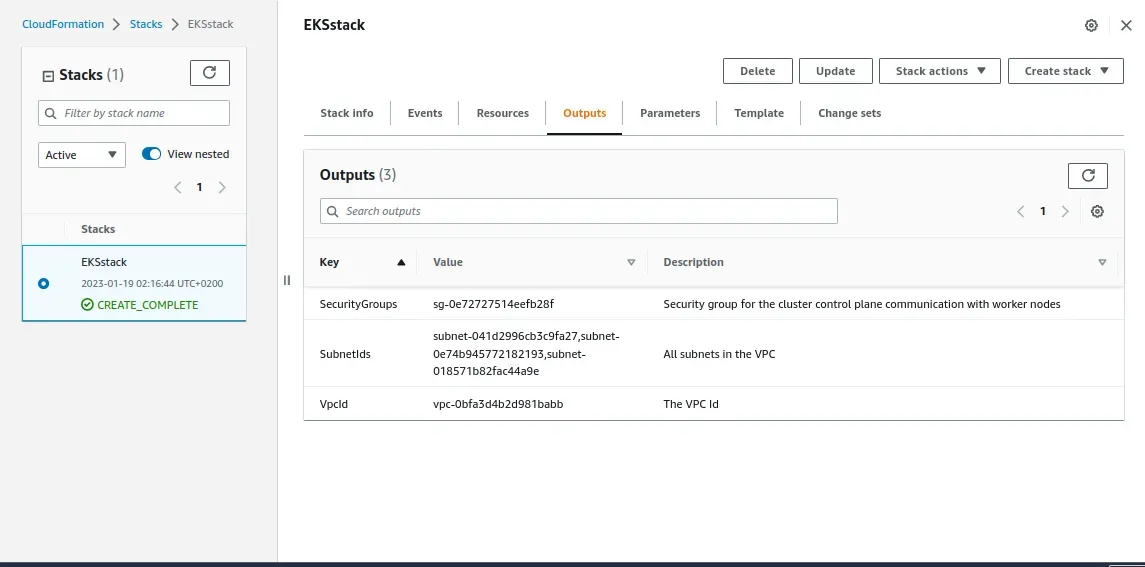
Now, CloudFormation will begin to create the VPC. Once done, be sure to note the various values created Security Groups, Vpc ID and Sub-nets ID. You will need these in subsequent steps. You can see these under the Outputs tab of the CloudFormation stack.
Step 3: Creating the EKS cluster
we will use the AWS CLI to create the Kubernetes cluster. To do this, use the following command:
aws eks --region <region> create-cluster --name <clusterName> --role-arn <EKS-role-ARN> --resources-vpc-config subnetIds=<subnet-id-1>,<subnet-id-2>,<subnet-id-3>,securityGroupIds=<security-group-id>Note
Be sure to replace the bracketed parameters as follows:
- Region — the region in which you wish to deploy the cluster.
- ClusterName — a name for the EKS cluster you want to create.
- EKS-role-ARN — the ARN of the IAM role you created in the first step.
- SubnetIds — SubnetIds values from the AWS CloudFormation output that you generated in the previous step.
- Security-group-id — the SecurityGroups value from the AWS CloudFormation output that you generated in the previous step.
This is an example of what this command will look like:
aws eks --region us-east-1 create-cluster --name MyEKSCluster --role-arn arn:aws:iam::2250563332314:role/EKSrole --resources-vpc-config subnetIds=subnet-041d2996cb3c9fa27,subnet-0e74b945772182193,subnet-018571b82fac44a9e,securityGroupIds=sg-0e72727514eefb28f"cluster": { "name": "MyEKSCluster", "arn": "arn:aws:eks:us-east-1:225052323284:cluster/MyEKSCluster", "createdAt": "2023-01-19T03:02:39.215000+02:00", "version": "1.23", "roleArn": "arn:aws:iam::222505232328:role/EKSrole", "resourcesVpcConfig": { "subnetIds": [ "subnet-041d2996cb3c9fa27", "subnet-0e74b945772182193", "subnet-018571b82fac44a9e" ], "securityGroupIds": [ "sg-0e72727514eefb28f" ], "vpcId": "vpc-0bfa3d4b2d981babb", "endpointPublicAccess": true, "endpointPrivateAccess": false, "publicAccessCidrs": [ "0.0.0.0/0" ] }, "kubernetesNetworkConfig": { "serviceIpv4Cidr": "10.100.0.0/16", "ipFamily": "ipv4" }, "logging": { "clusterLogging": [ { "types": [ "api", "audit", "authenticator", "controllerManager", "scheduler" ],}Usually it takes about 5 minutes before your cluster is created. You can ping the status of the command using this CLI command:
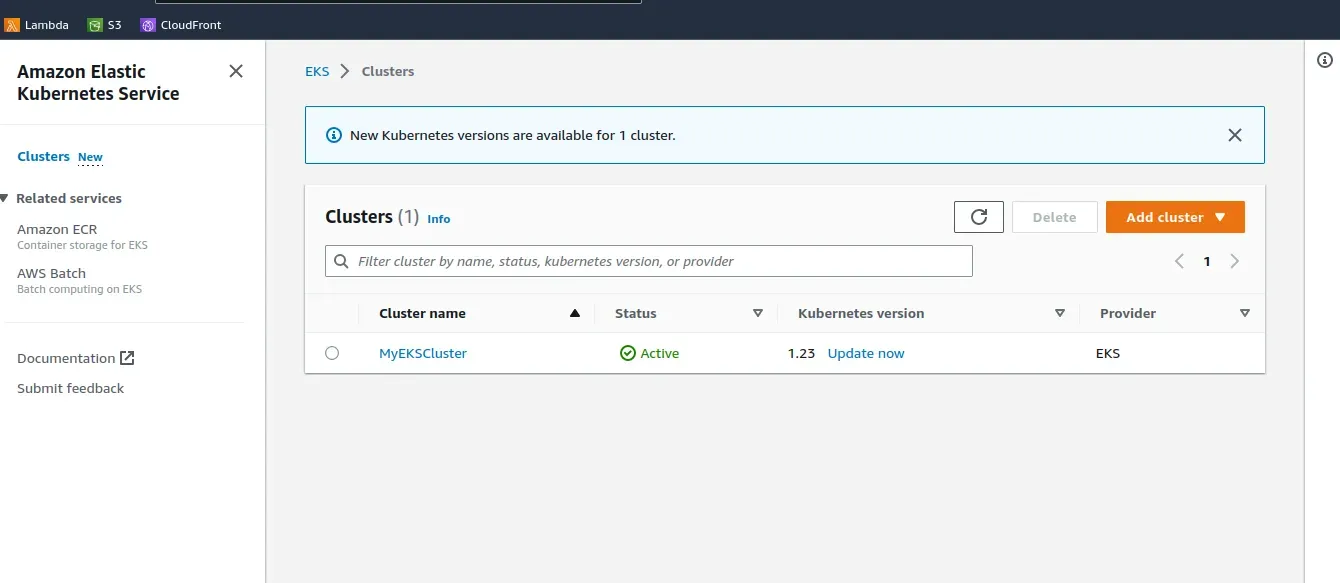
aws eks --region us-east-1 describe-cluster --name MyEKSCluster --query cluster.statusOr you can open the Clusters page.
Once the status changes to “ACTIVE”, we can proceed with updating our kubeconfig file with the information on the new cluster so kubectl can communicate with it. I will use the AWS CLI update-kubeconfig command to do that.
aws eks --region us-east-1 update-kubeconfig --name MyEKSClusterAnd you should see
Added new context arn:aws:eks:us-east-1:232326333784:cluster/MyEKSCluster to /home/f0dy/.kube/configNow you can test the configurations using the kubectl get svc command.
kubectl get svc
Click the cluster in the EKS Console to review configurations:

Step 4: Launching Kubernetes worker nodes
Now that we’ve set up our cluster and VPC networking, we can now launch Kubernetes worker nodes. We will again use a CloudFormation template. Again open CloudFormation, click Create Stack, and this time use the following template URL:
https://amazon-eks.s3-us-west-2.amazonaws.com/cloudformation/2019-01-09/amazon-eks-nodegroup.yaml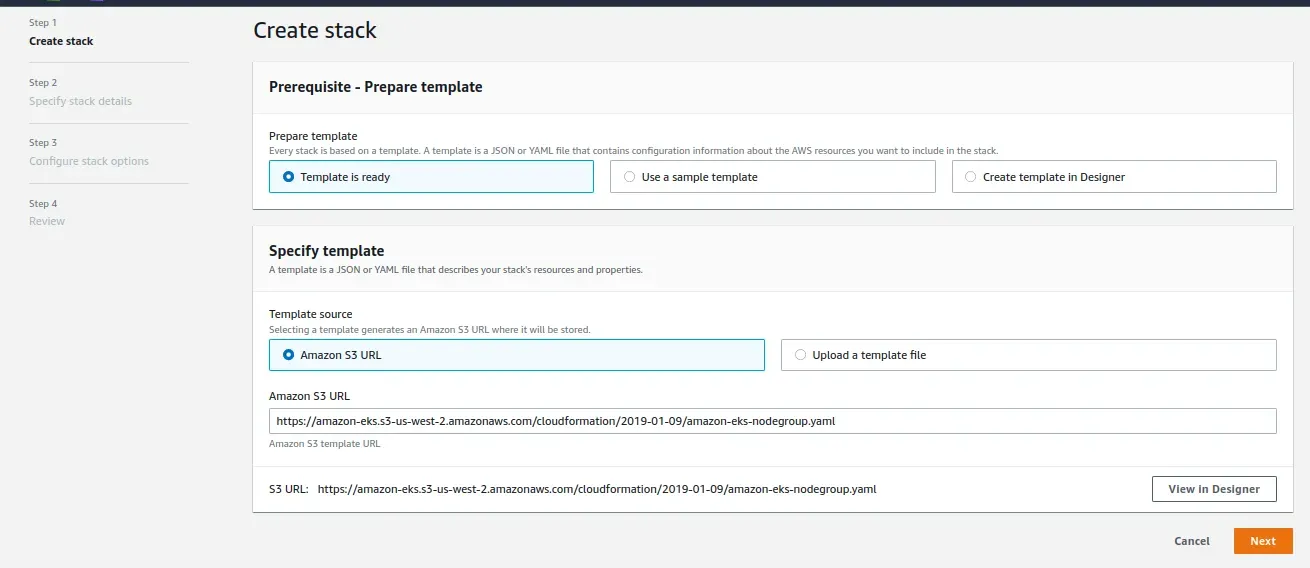
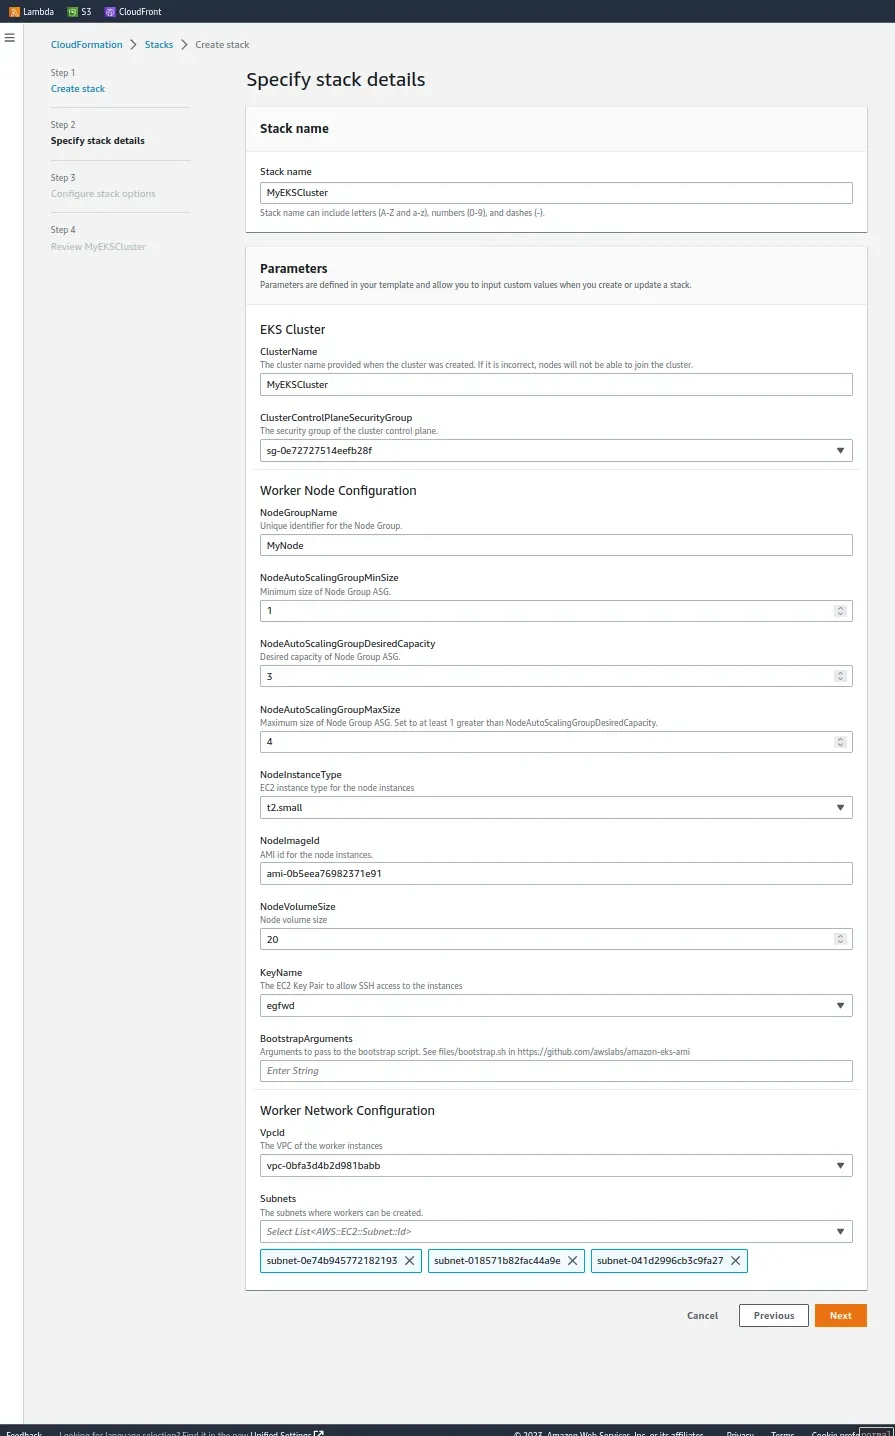
Note (Click next, name your cloudformation stack, and in the eks cluster section enter the following)
- ClusterName – the name of your Kubernetes cluster (e.g. MyEKSCluster)
- ClusterControlPlaneSecurityGroup – the same security group you used for creating the cluster in previous step.
- NodeGroupName – a name for your node group.
- NodeAutoScalingGroupMinSize – leave as-is. The minimum number of nodes that your worker node Auto Scaling group can scale to.
- NodeAutoScalingGroupDesiredCapacity – leave as-is. The desired number of nodes to scale to when your stack is created.
- NodeAutoScalingGroupMaxSize – leave as-is. The maximum number of nodes that your worker node Auto Scaling group can scale out to.
- NodeInstanceType – leave as-is. The instance type used for the worker nodes.
- NodeImageId – the Amazon EKS worker node AMI ID for the region you’re using. For us-east-1, for example: ami-0b5eea76982371e91
- KeyName – the name of an Amazon EC2 SSH key pair for connecting with the worker nodes once they launch.
- BootstrapArguments – leave empty. This field can be used to pass optional arguments to the worker nodes bootstrap script.
- VpcId – enter the ID of the VPC you created in Step 2 above.
- Subnets – select the three subnets you created in Step 2 above.
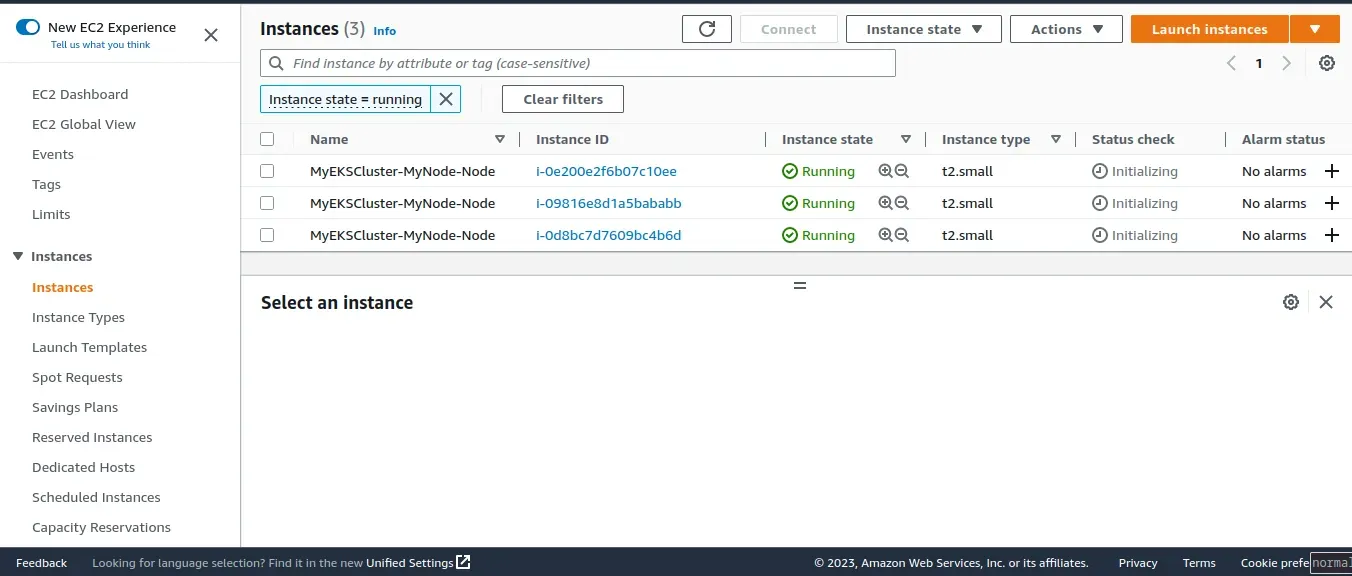
Click Next and check the box at the bottom of the page acknowledging that the stack might create IAM resources. CloudFormation will create the worker nodes with the VPC settings we entered and three new EC2 instances will be created.
As before, once the stack is created, open Outputs tab:
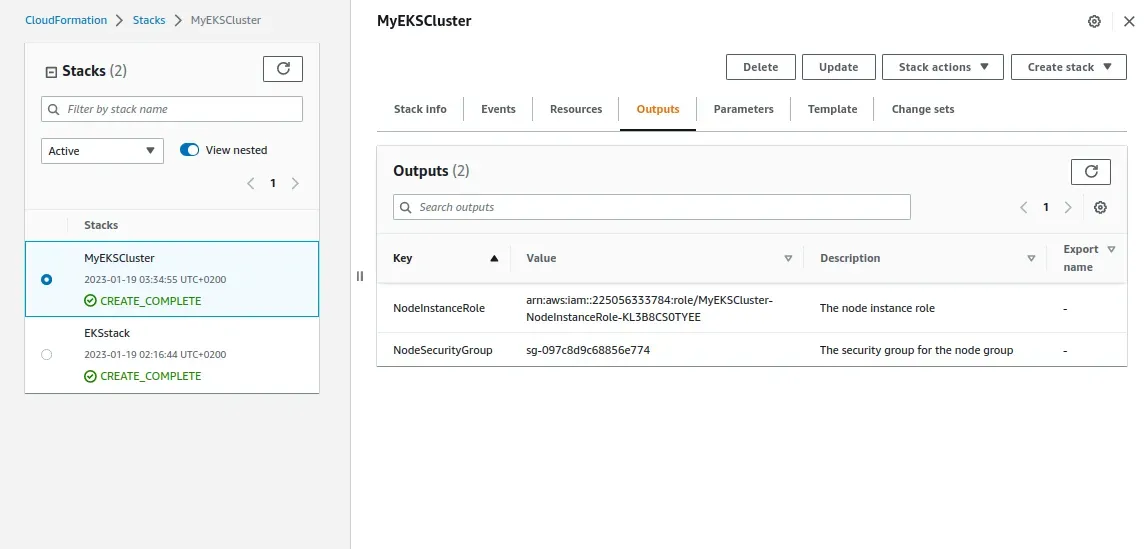
Now download the AWS authenticator configuration map:
curl -O https://amazon-eks.s3-us-west-2.amazonaws.com/cloudformation/2019-01-09/aws-auth-cm.yamlOpen the file and replace the rolearn with the ARN of the NodeInstanceRole created above: and then save the file and apply the config:
kubectl apply -f aws-auth-cm.yamlYou should see
configmap/aws-auth createdUse kubectl to check on the status of your worker nodes:
kubectl get nodes --watchStep 5: Installing an app on Kubernetes
Congrats! you made it Your Kubernetes cluster is created and set up.
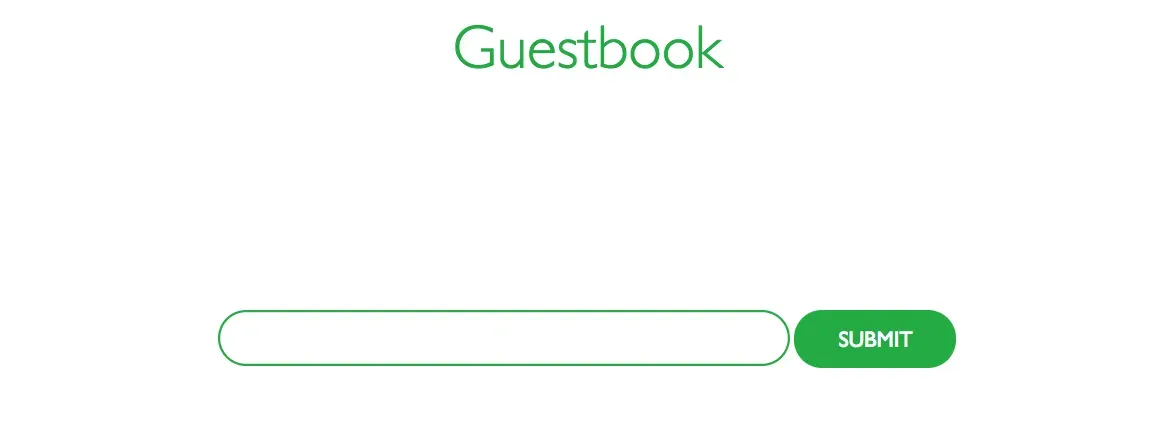
we’re going to deploy a simple Guestbook app. The following commands create the different Kubernetes building blocks required to run the app. The Redis master replication controller, the Redis master service, the Redis slave replication controller, the Redis slave service, the Guestbook replication controller and the guestbook service itself:
kubectl apply -f https://raw.githubusercontent.com/kubernetes/examples/master/guestbook-go/redis-master-controller.jsonkubectl apply -f https://raw.githubusercontent.com/kubernetes/examples/master/guestbook-go/redis-master-service.jsonkubectl apply -f https://raw.githubusercontent.com/kubernetes/examples/master/guestbook-go/redis-slave-controller.jsonkubectl apply -f https://raw.githubusercontent.com/kubernetes/examples/master/guestbook-go/redis-slave-service.jsonkubectl apply -f https://raw.githubusercontent.com/kubernetes/examples/master/guestbook-go/guestbook-controller.jsonkubectl apply -f https://raw.githubusercontent.com/kubernetes/examples/master/guestbook-go/guestbook-service.jsonUse kubectl to see a list of your services:
kubectl get svcNAME TYPE CLUSTER-IP EXTERNAL-IP PORT(S)guestbook LoadBalancer 10.100.8.214 <guestbook’s external IP> 3000:31024/TCPkubernetes ClusterIP 10.100.0.1 <none> 443/TCPredis-master ClusterIP 10.100.241.18 <none> 6379/TCPOpen your browser and point to the guestbook’s external IP at port 3000 and you should see:
Summing it up
If you are AWS power users, Amazon EKS is a natural fit. For those of you who are just starting in the cloud, Amazon EKS might seem a bit daunting to begin with.